1 | <div id="app"> |
mixins选项
mixins是混入选项操作,一般用于在你写完构造器后想加些东西却不想污染构造器时使用,一种是当很多地方需要用时作为全局的使用,随时可以调用,同时下面的栗子中构造器原生的updated和构造器内的和全局的还有顺序规则,需要注意的是如果构造器内的mixin的名和构造器内方法的名字重了,就不存mixin了
1 | <div id="app"> |
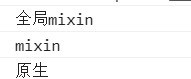
顺序:全局 构造器内 原生
methods选项
methods方法一般跟@click这样的绑定,下面有三个栗子,分别是简单的传值绑定,组件绑定,实例外绑定
1 | <div id="app"> |
computed选项
computed选项一般用来改变原来的值得形式,使data选项里的值尽量的整洁简单,因此我们一般用computed选项来给绑定的值进行改变大小写啊,添加修饰啊。下面就举一个将新闻日期倒过来的小栗子,因为数据输入时是旧时间到新时间,而我们想要的是先看到新时间的新闻,所以在computed中使用computed就很有必要
1 | <div id="app"> |
propsData
实际上propsData他不是挂载个属性,它是一个选项,甚至说这很不常用,完全可以用组件实现,但是要认识他,他是个传递数据的选项
1 | <div id="summer"></div> |
keyframes
与transition不同,这个可以在一开始就进行动画演示,无需操作,这在CSS动画中是很重要的部分,他可以让你任意调动,说白了,这个关键帧动画实际上就是多个补间动画,另外还有一种逐帧动画,它是一种特殊的关键帧动画,只不过他没有补间动画是一帧一帧的,但是他资源使用大,因此除了另两个动画搞不定的情况下尽量不要使用,因为他包含于keyframes里,因此说CSS设置动画实质上就两种transition和keyframes
1 | <style> |
栗子中的run是动画名要与下面的@keyframes后的对应好了
当然transition里可以用的这里也可以用,比如说可以加上像linear这样的
1 | animation: run 1s linear ; |
当只有前后两个节点时一般会写成from to来代替0% 100%
1 | @keyframes run{ |
还有一些有意思的animation属性
设置动画倒着开始
1 | animation-direction: reverse; |
设置动画不要回来了
1 | animation-fill-mode: forwards; |
设置动画循环次数,这里的infinite是无数次
1 | animation-iteration-count: infinite; |
设置动画停止
1 | animation-play-state: paused; |
逐帧动画
1 | <style> |
其实就是加个
1 | animation-timing-function: steps(1); |